

This guide is an update to David Erickson’s tutorial that shows how to track referral traffic dynamically, which is itself an update to Jim Gianoglio’s tutorial. Erickson’s post is from 2017, and a few things have changed in the time since it was originally posted.
I used his tutorial to track dynamic referral traffic for a client using Google Tag Manager (GTM), and had to make a few adjustments due to the changes to GTM since the article was posted.
This updated tutorial reflects the adjustments I made to account for GTM updates since 2017. Our tutorial requires you to have an understanding of Google Analytics (GA) and Google Tag Manager, and that you have them both installed. For this tutorial to work, GA must be installed using a GTM Pageview tag.
Alternatively, you may watch the Youtube tutorial here:
Why Track Dynamic Referral Traffic?
If you run display ads or a press release, you have little control over where your ads are served. You may choose any number of reasons for wanting to know where your display ads are being shown, but I chose to try to track it because I wanted transparency for my client, I wanted to know which sites drive conversions, and because I was curious about where our ads were being served.
Using a Dynamic Source UTM provides insight into what’s driving traffic and conversions.
Note: Using a standard static source will give you context that your traffic came from “utm_source=display-ads,” but you lose a lot of valuable data. In this example, you know your visitors came through a Display Ad, but have no idea what they saw and where they saw it.
How To Tag URLs To Dynamically Capture Source Referrals
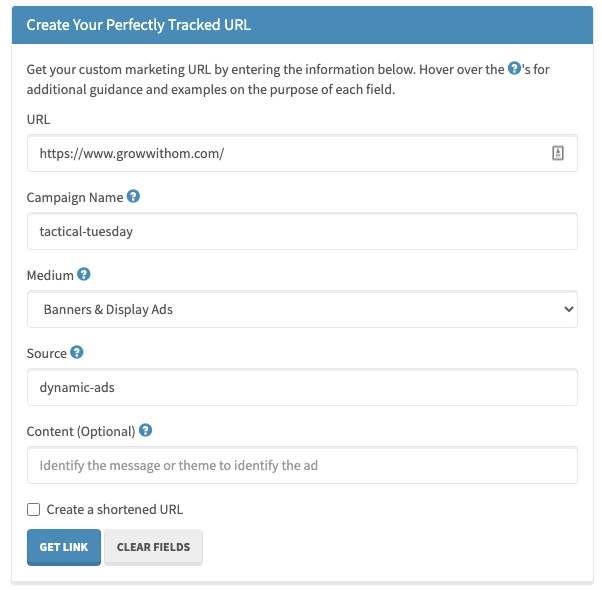
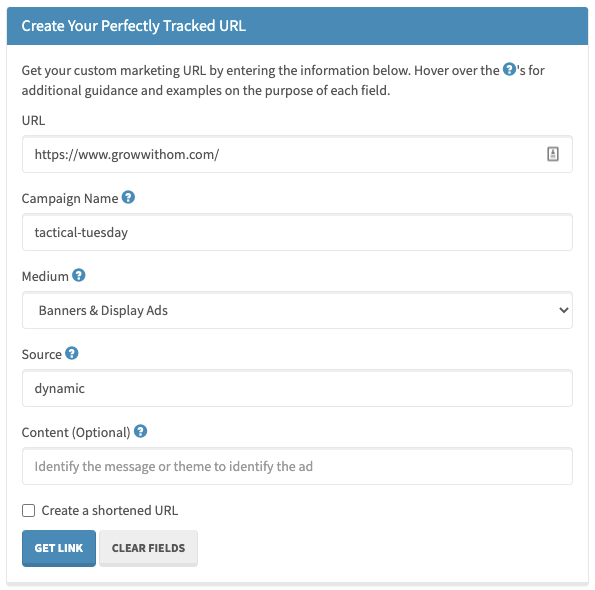
To start, you will want to change your utm_source parameter to dynamic. Using UTM Maker’s template, the parameters would now look like this:
We also like utm.io! Check out some of the best Chrome Extensions for digital marketers!
Leave all of your other parameters the same except for utm_source.
My URL is now “https://www.growwithom.com/?utm_source=dynamic&utm_medium=display&utm_campaign=tactical_tuesday”
Configure GTM to Dynamically Capture the utm_source Parameter
1. Create Variables for Each UTM Parameter
Google Tag Manager is able to analyze UTM parameters, but only if we tell it to. To start, we need to create GTM variables for each parameter. Don’t skip creating a variable for any of these parameters, otherwise this will not work.
- utm_source
- utm_medium
- utm_campaign
- utm_content
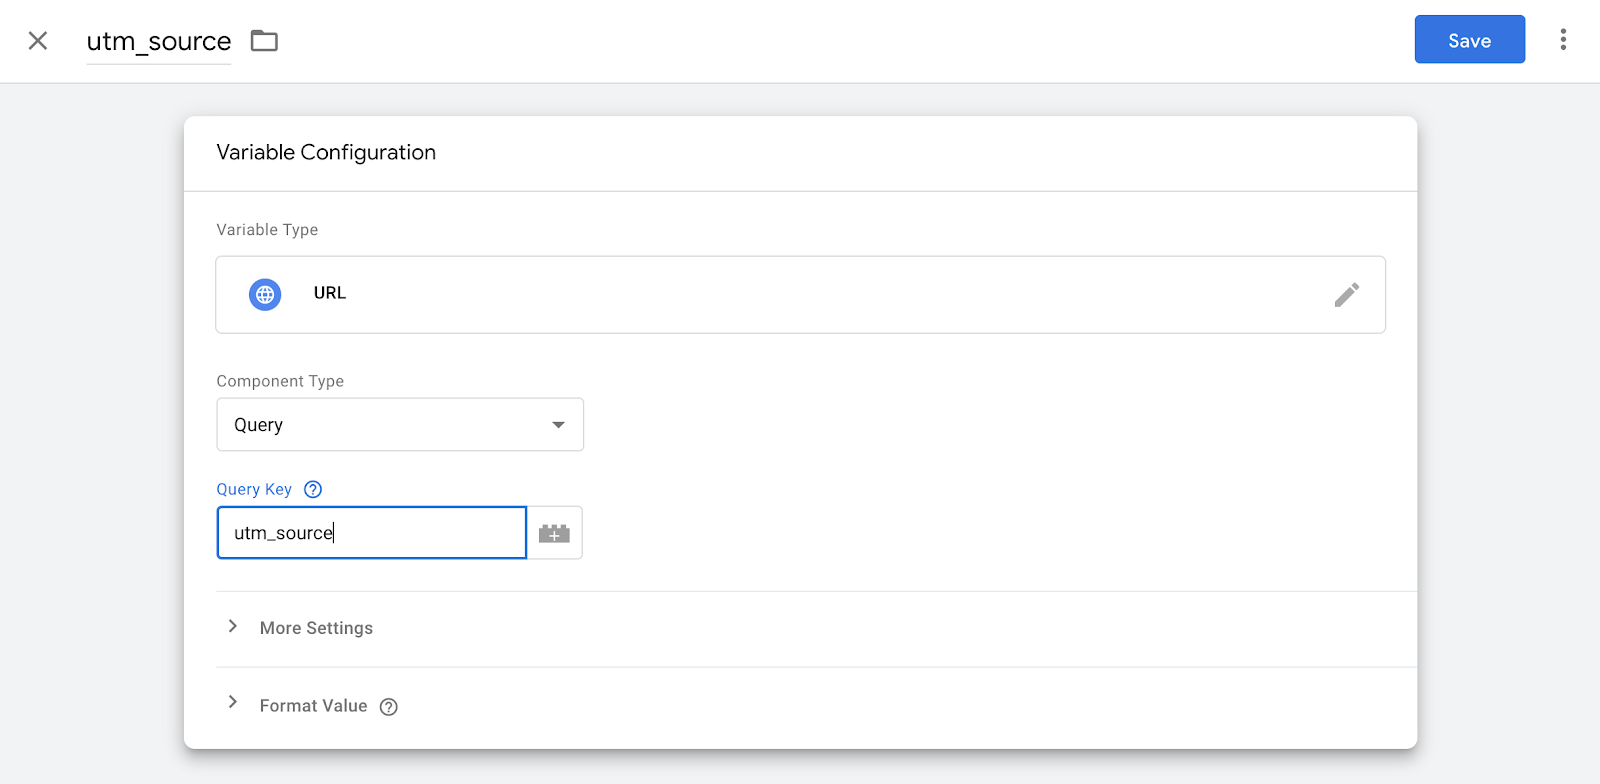
To do this, click on the Variables section and create a new variable and name it utm_source.
Pick the URL Variable Type, then choose Query under the Component Type dropdown. Finally, type utm_source as your Query Key. You shouldn’t need to access More Settings or Format Value.
Your configuration should look like this once you’re finished:
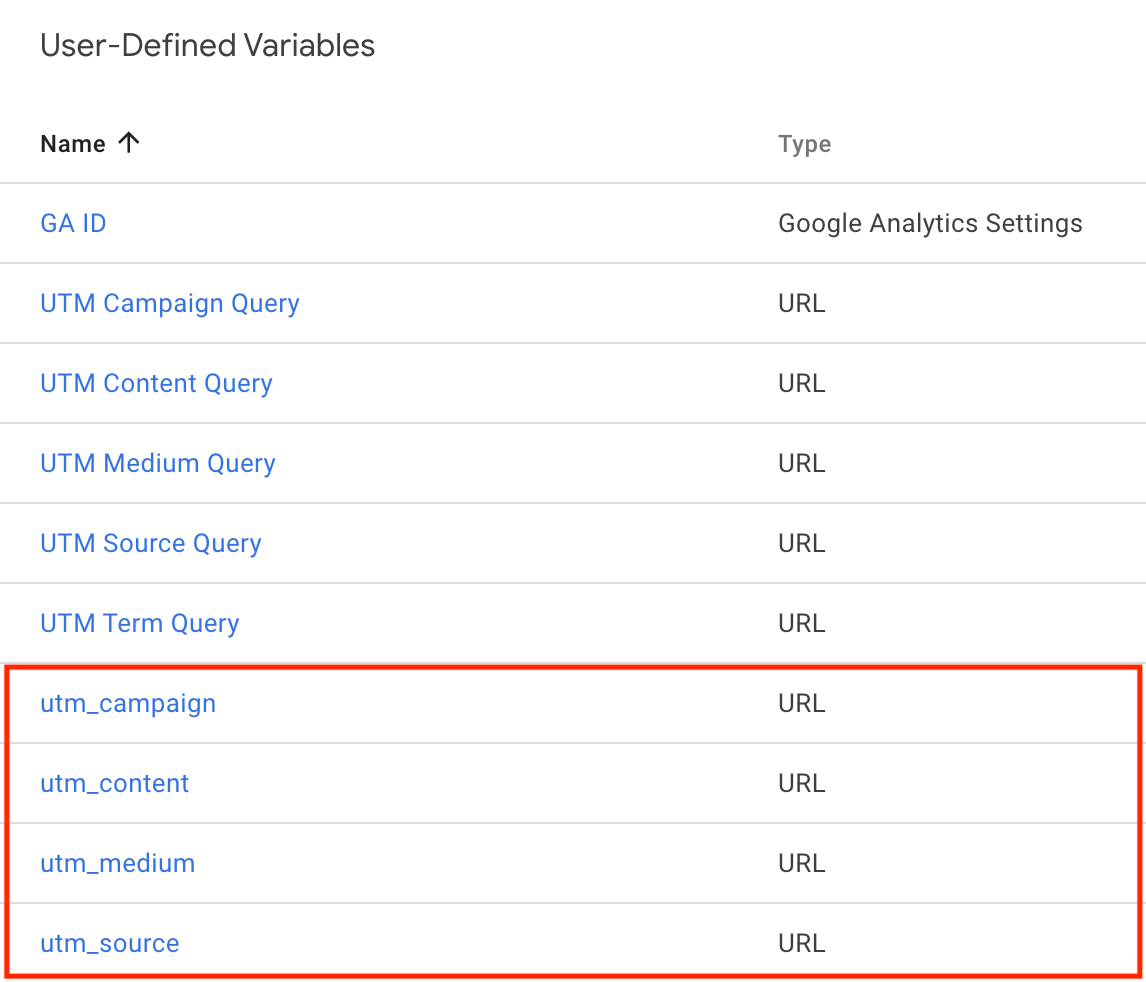
Save your variable and repeat for utm_medium, utm_campaign, and utm_content. Once finished, you should have these four variables:
- utm_source
- utm_medium
- utm_campaign
- utm_content
Here’s what the variables should look like in your GTM account:
2. Replace Dynamic UTM Source Parameter with Referring URL
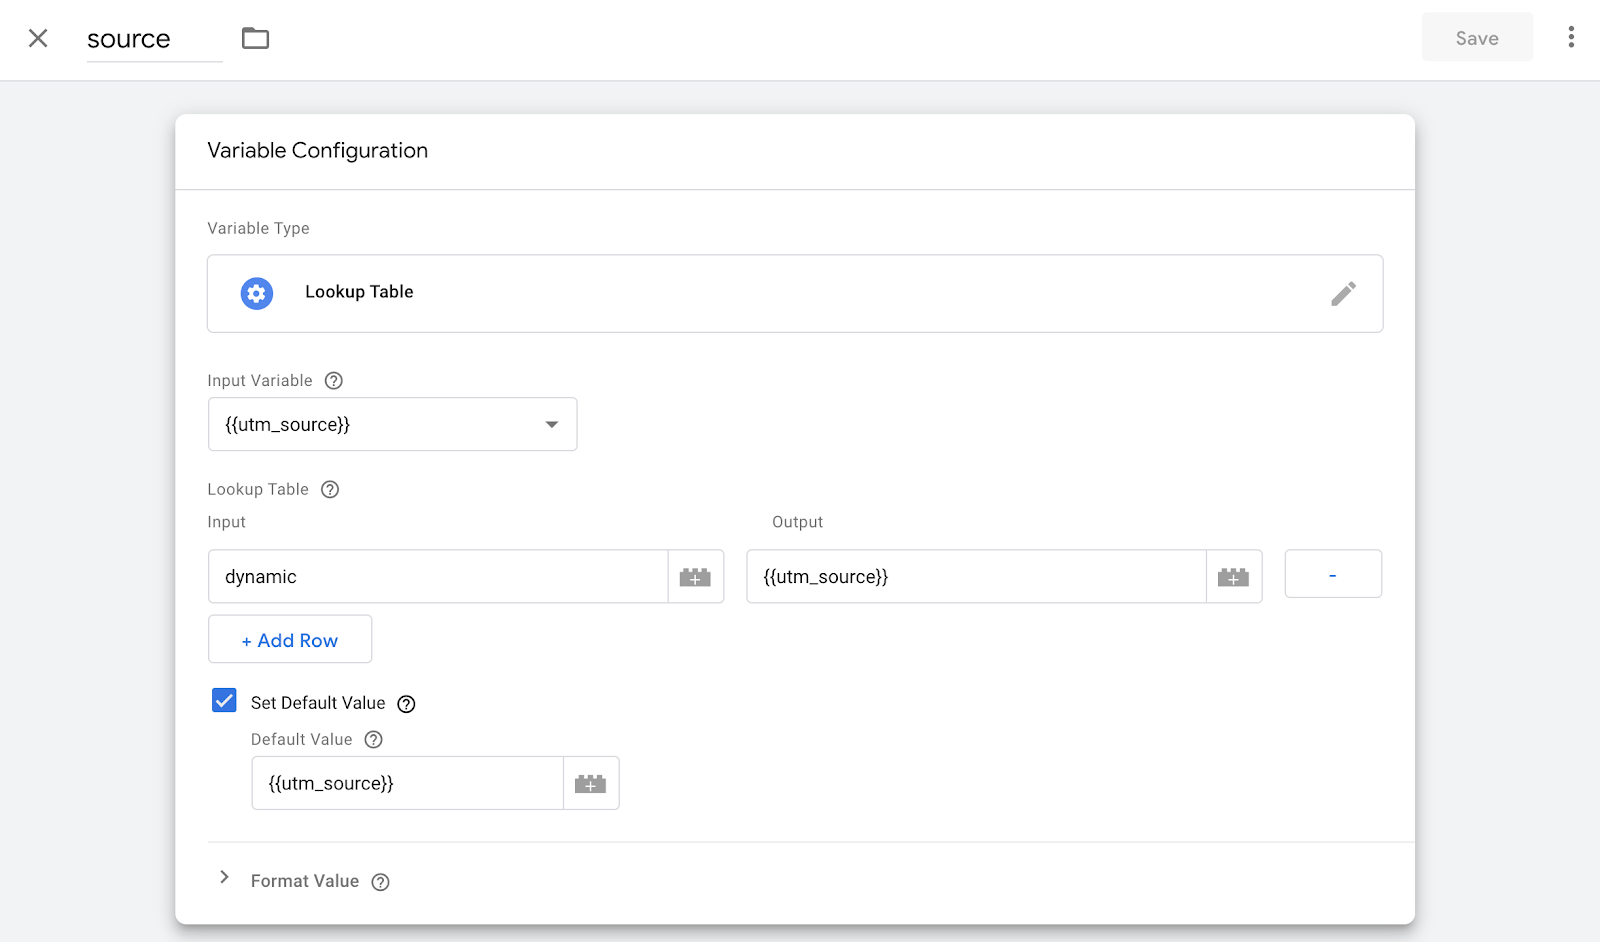
Once you have your parameter variables saved, we need to create a new variable that will change the value of utm_source from dynamic to reflect the referring URL. To do this, we’ll use a Lookup Table, which searches for a utm_source value of dynamic, then automatically replaces it with the referring URL.
In the Variables section of GTM, create a new variable titled source. Scroll to the Utilities section and choose the Lookup Table Variable Type. Choose the {{utm_source}} variable we just created in the last step as your Input Value in the dropdown menu.
Under the Lookup Table section, click Add Row and type dynamic into the Input field. Choose {{Referrer}} using the Lego block icon for the Output field. Make sure you remember the exact spelling of dynamic when following this guide, down to the case capitalization.
Finally, check the Set Default Value box and choose utm_source using the Lego block. This will prevent GTM from overwriting any parameters where the source isn’t set to dynamic. Save the variable and it’s on to the next step.
This is how your source Lookup Table variable configuration should look:
3. Configure Pageviews Tag to Search for UTM Parameters
Once the variables have been created for your UTM parameters and a Lookup Table to replace the dynamic source value with the referring site’s URL, configure your Pageviews Tag to instruct it to look for those parameters.
To do this, move to the Tags section of GTM and edit your Google Analytics Pageviews tag. This is the tag that should house your Google Analytics tracking code. If GA isn’t hosted in your GTM, you’re going to need to remove it from your site and create a Pageviews tag.
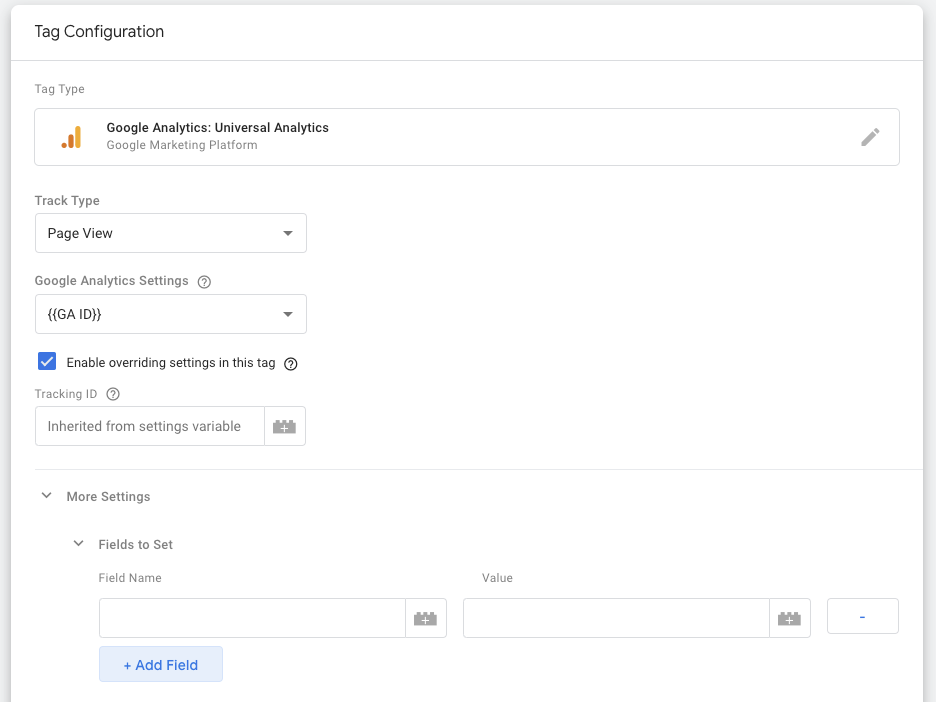
Check the “Enable overriding settings in this tag” box, and you’ll see a collapsed “More Settings” menu. Expand this menu, then expand “Fields to Set.” You’ll see a Tracking box that says “Inherited from Settings Variable.” This should pull from your Google Analytics variable by default, but you may want to add the variable in if you’re having trouble getting this to work.
Click the Add Field button, and you should see this:
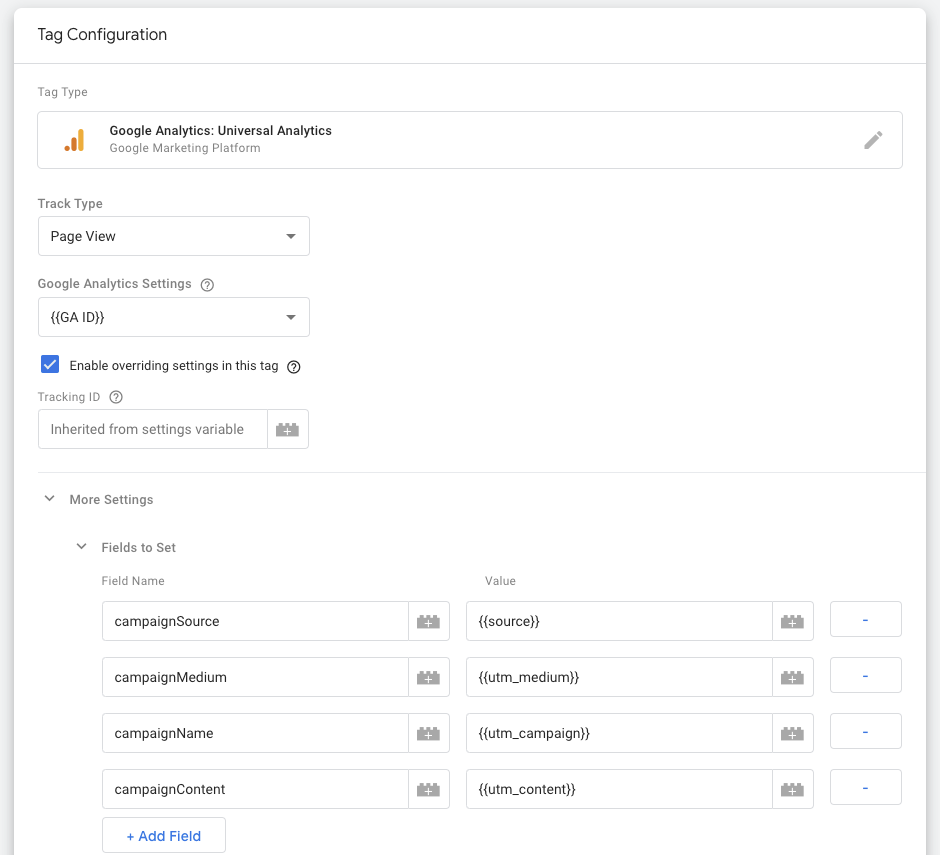
In the Field Name field, type campaignSource and for its Value, choose the source Lookup Table Variable you created earlier using the handy-dandy Lego block. Be sure you do not choose utm_source.
Click Add Field and type campaignMedium for the Field Name and choose the utm_medium Variable you created.
Click Add Field and type campaignName for the Field Name and choose the utm_campaign Variable you created.
Click Add Field and type campaignContent for the Field Name and choose the utm_content Variable you created.
You may notice that the campaignParameter variables populate as you type them, so feel free to click on them to expedite the process a bit.
Here’s what the Fields to Set section of your Pageviews tag should look like when you’re done:
Save your Pageviews tag, and now you’re ready to preview and test.
Test with Dynamically Tagged URLs
Once you’ve saved your tag, switch to Preview mode and test. Using the URL we shared earlier, “https://www.growwithom.com/?utm_source=dynamic&utm_medium=display&utm_campaign=tactical_tuesday,” we can place it on another domain. Making sure that you’re in Preview mode, click on the link to your site and review the Pageviews tag in GTM Preview mode. You should see it under Tags Fired On This Page.
Click on the Pageviews tag to examine its properties. Expand Fields to Set and you should see the actual referring URL and not the word dynamic in the campaignSource.
Now that you know the configuration works, publish the version and wait for the referral data to pass into your Google Analytics account.
Viewing Referral Source Data in Google Analytics
You can find your referral source data from your dynamic UTM source campaigns by clicking Acquisition → All Traffic → Source/Medium.
You can filter your results by your common utm_medium parameter and review all of your dynamic referral sources here.
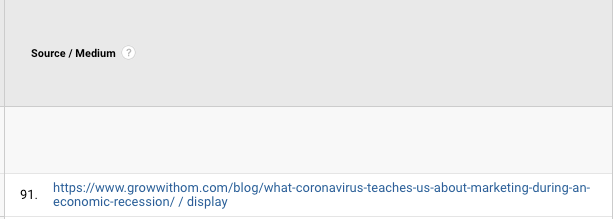
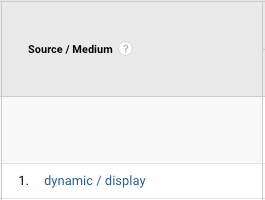
We tested this process for a client, using a similarly UTM’d URL from our blog to test the configuration. Here is the source/medium in their Google Analytics account:
If the tag is NOT working, you’ll see this instead. While I was testing my configuration using Erickson’s tutorial, I had been unable to find More Settings, and tested it without properly configuring the Pageview tag. Because of this, the tag did not fire properly and I was left with this as a result:
And there you have it. Dynamic UTM Tracking, updated for 2020. We hope this article helps you track your referral traffic, and don’t hesitate to reach out if you have any questions! We’ll update this blog as needed, so let us know if you notice anything outdated.
If you’re having issues getting this to work, we recommend checking out our blog, 10 Google Tag Manager Mistakes You Don’t Want to Make to make sure you’re not making any of these common mistakes!
As a reminder, you can watch a video tutorial to follow along here:
Looking for a performance marketing team to grow your digital marketing strategy? Request a Discovery Call to learn how we can help!